For Spec Builders: How To Install European Tilt & Turn Windows in U.S. Framing (Video Tutorial)

Explore how to install European windows in a U.S. building to avoid costly mistakes.
Incorrect flangeless installation can quickly turn savings into callbacks, water intrusion claims, and schedule delays.
Make sure the installation is done correctly so you don’t lose the savings you gained by importing European windows.
Watch Tutorial How to Install Tilt & Turn Windows in U.S. Framing:
From this article, you’ll learn:
- 1: How to prepare the window opening
- 2: How to prepare the windows for installation
- 3: How to install the window strap anchors
- 4: How to place the window in the opening
- 5: How to fasten the window to the framing
- 6: How to insulate and seal the window in the framing
- 7: How to reinstall the window sash
- What Amercian installers say about flangeless installation
- What decisions to make before ordering European windows
- What are the Frequently Asked Questions
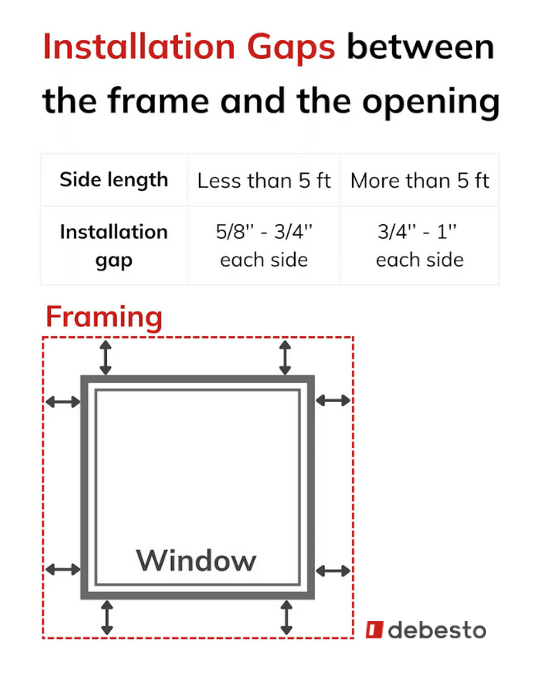
Stage 1: Prepare the window opening for installation
Start with measuring and preparing the windows opening. If you are unsure whether the opening is perfectly square, measure the height and width in three places and use the smallest value.
Tools needed for measuring:
- a retractable or laser
- measuring tape
- a spirit level
The first thing for you to watch out are window and opening sizes. In European installation, the window should be slightly smaller than the opening.
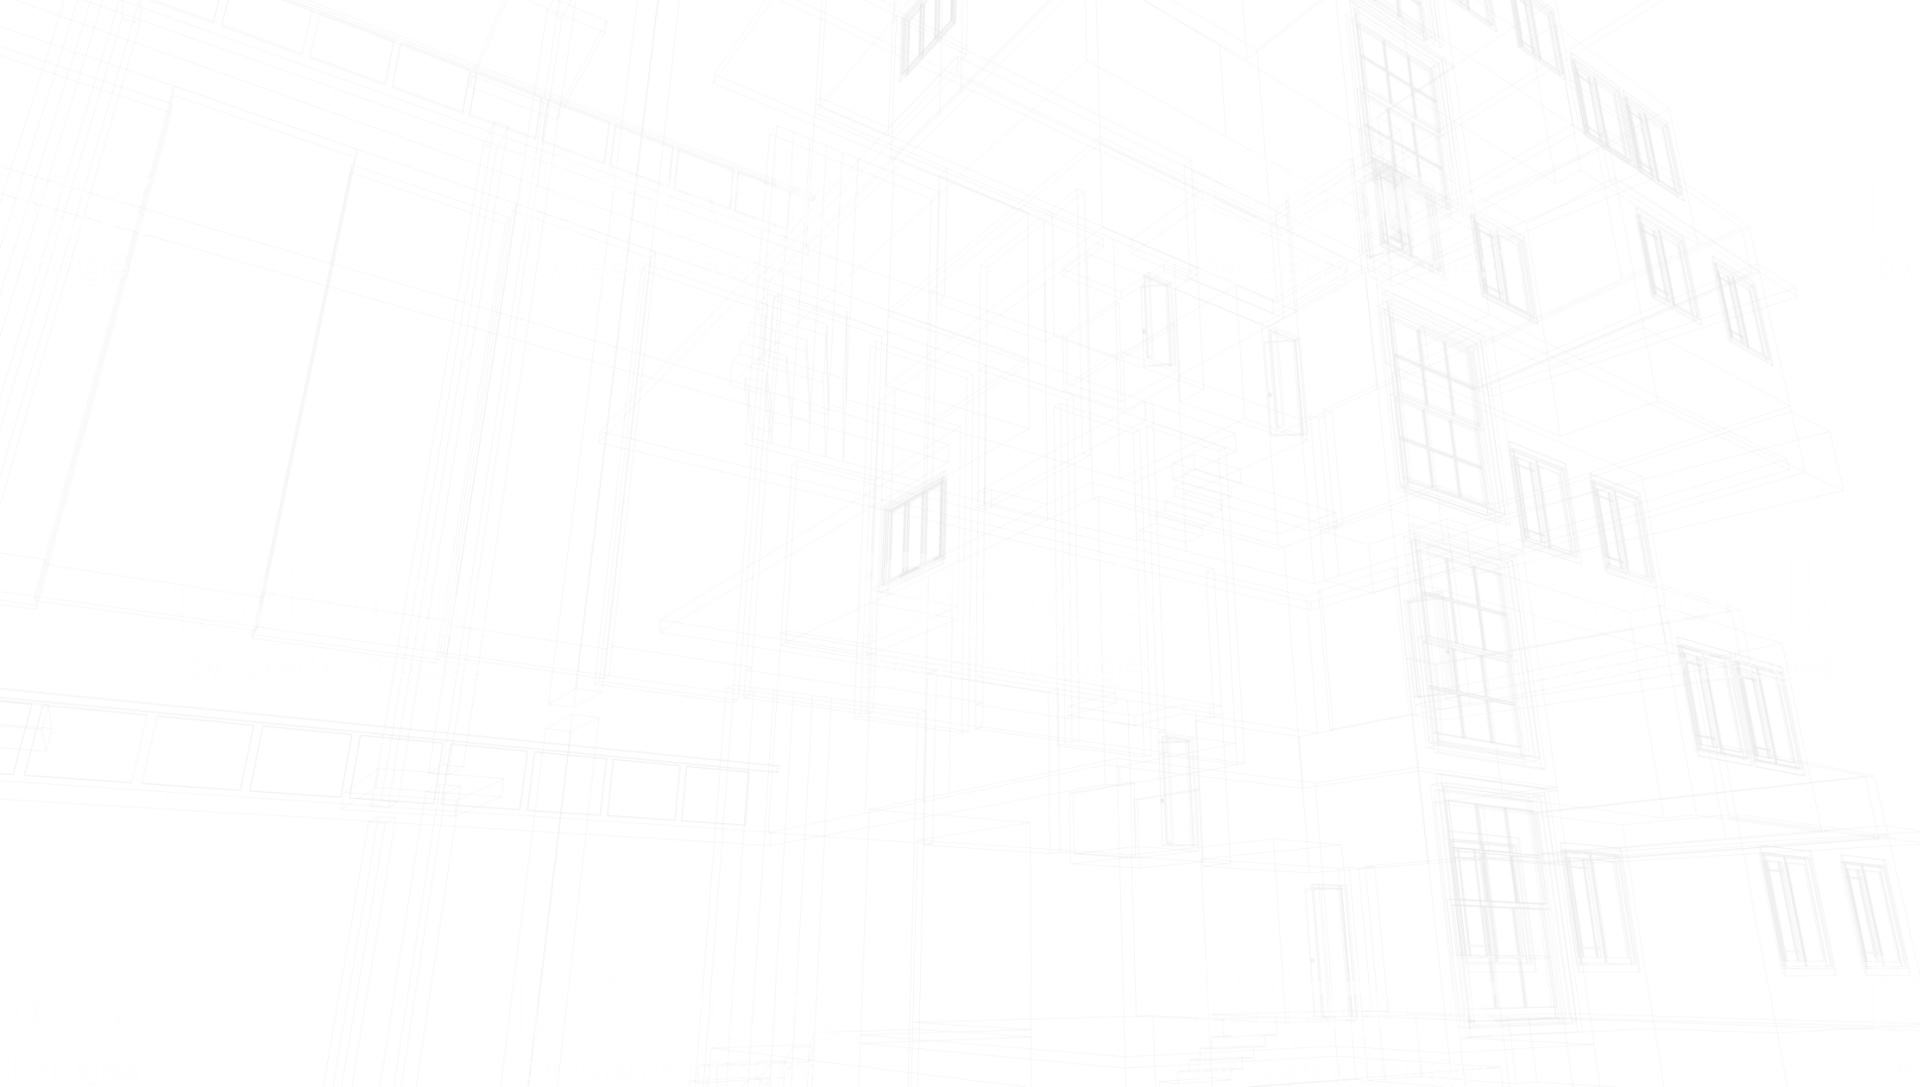
How much space to prepare as a mounting gap between frame and opening?
- For window size up to 5′ x 5′ prepare a gap of 5/8″ – 3/4″ on each side
- For window size above 5′ x 5′ prepare a gap of 3/4″ – 1″ on each side
If planning to install windowsills, consider adding a sill adapter, which is usually included by default with PVC windows and is often an option for aluminum windows. The standard height of a sill adapter is 1.2 inches and should be factored into the final measurements.
Sealing
Prepare the window opening the way you normally would. Seal the bottom of the window opening carefully. Use airtight exterior window installation tape or other U.S. sealing systems. Make sure to prevent gaps sealing bottom and bottom corners.
Prepare the window placement
Use four wooden blocks to simplify placement and leveling.
If the window should be flush with the exterior wall, screw the blocks into the opening’s corners aligned with the wall face.
If the window needs to be recessed inward, place the blocks further inside.
If the window should be projected outward, mount the blocks with spacers underneath.
Stage 2: Prepare the window for installation
You will need:
- a screwdriver
- a mounting handle (+ a punch and pliers)
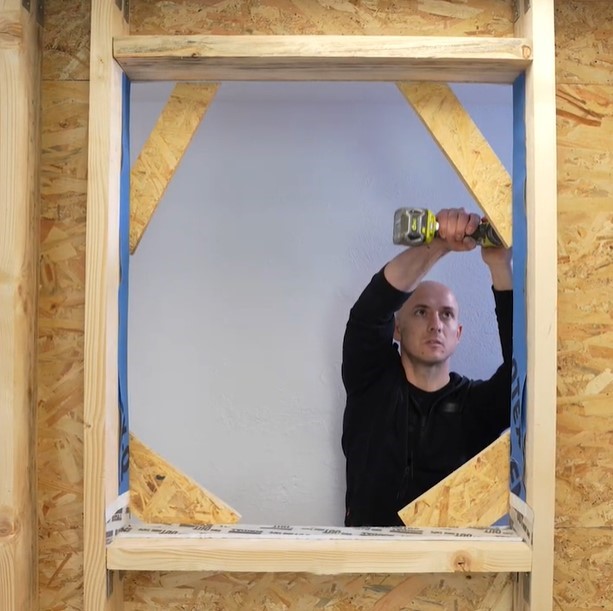
Remove the sash from the frame
If working with a tilt and turn window, remove the sash to make the frame lighter and easier to handle.
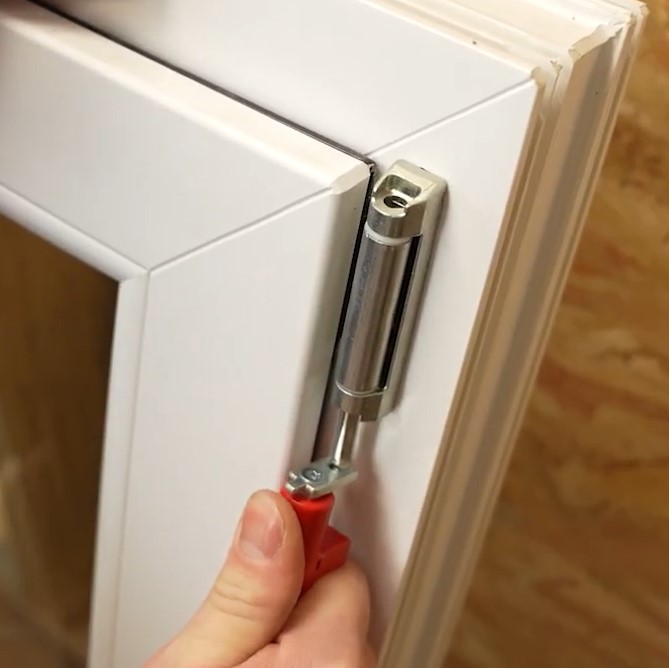
For visible hinges:
push the pin out of the top hinge, using a specialized tool included in a mounting handle or a punch and pliers.
Start from the top and push the pin downward once part of the pin is exposed pull it out completely to release the top hinge. Then lift the sash off the bottom hinge.
Watch out: The European sashes are more heavy than American ones, lift it with two or more people when needed.
For concealed hinges, the process depends on the brand and model; check with your supplier for specific instructions.
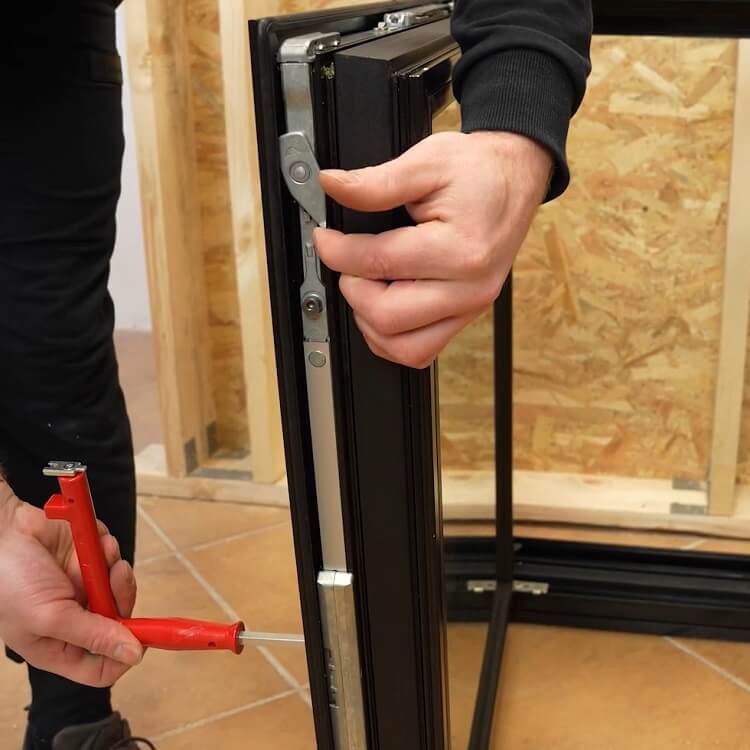
For hidden hinges (our case):
open the window to a 90 degree angle unlock the handle position lock.
Rotate the handle into the vertical tilted position to release the upper scissor mechanism.
Lift the sash slightly and push it toward the frame to disengage the second locking point.
Once the scissor arm is detached, lift the sash and set it aside.
For concealed hinges, the process depends on the brand and model; check with your supplier for specific instructions.
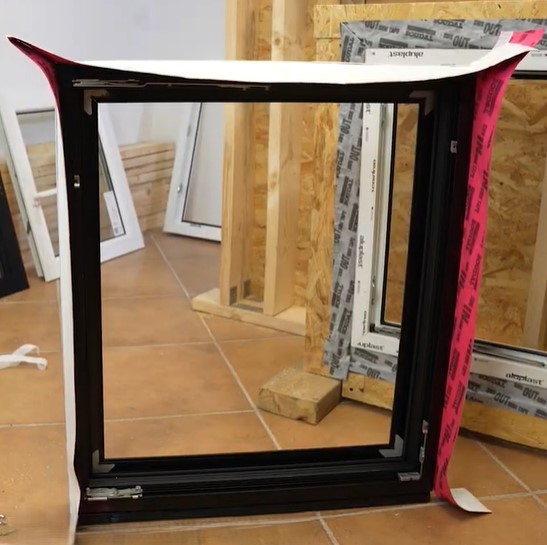
Seal the window frame
Apply waterproof and vapor tight tape to the inner side of the frame’s perimeter to ensure an airtight seal.
In the corners, cut and overlap the tape by its full width, but do not remove the protective layer from the overlaps yet.
If you are using a sill adapter, seal the bottom part after placing the window in the opening. If not, apply the tape to the bottom edge.
Stage 3: Install the window fixing strap anchors
You will need:
- waterproof tape,
- a utility knife,
- fixing strap anchors,
- a power screwdriver,
- stainless steel or galvanized self-drilling screws
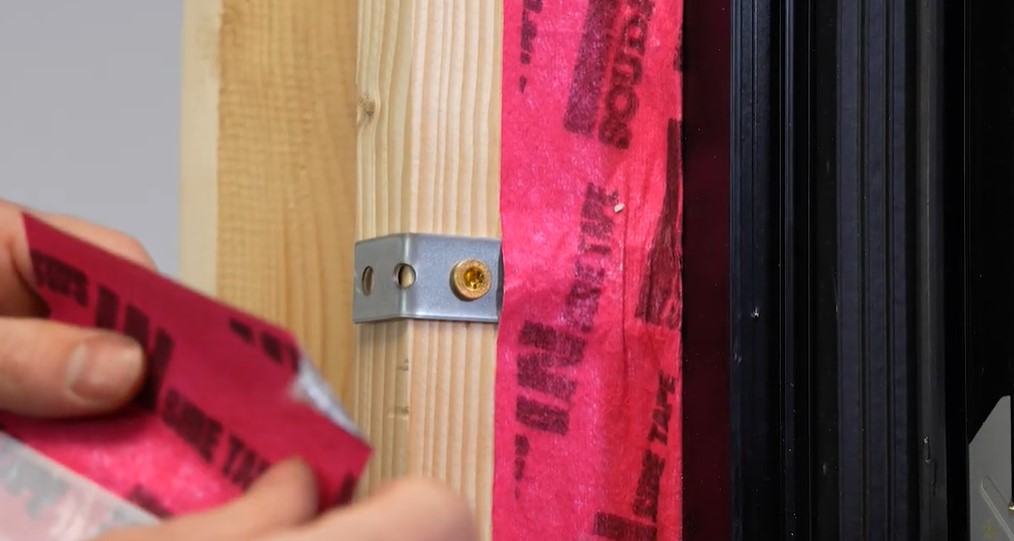
Insert the strap anchors into the window frame
- Maximum spacing between fastening points: 27.5 inches
- Distance from the inner corner of the frame 4-6 inches
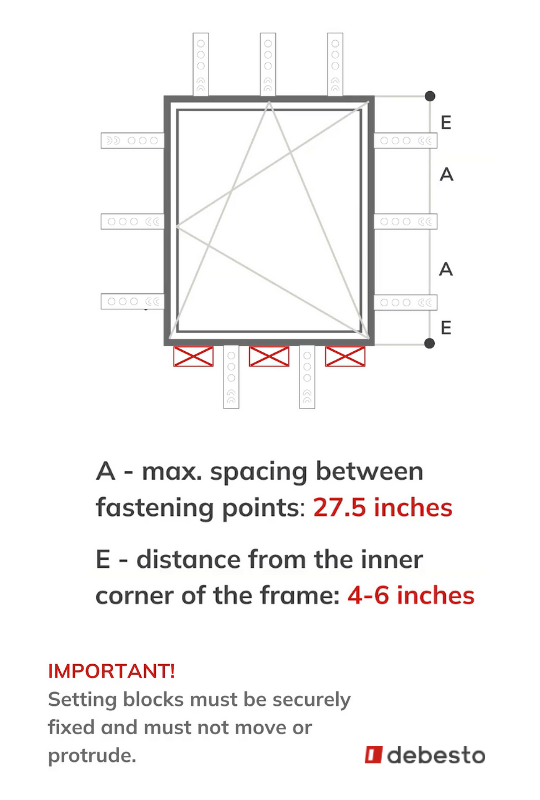
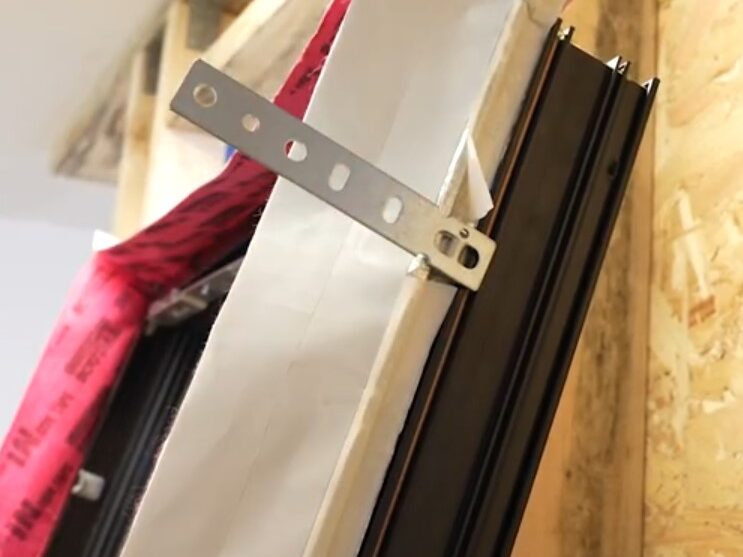
Following the instructions above, place each anchor into the window frame while it is in a vertical position.
Then rotate it downward until it is perpendicular to the frame, forming a right angle.
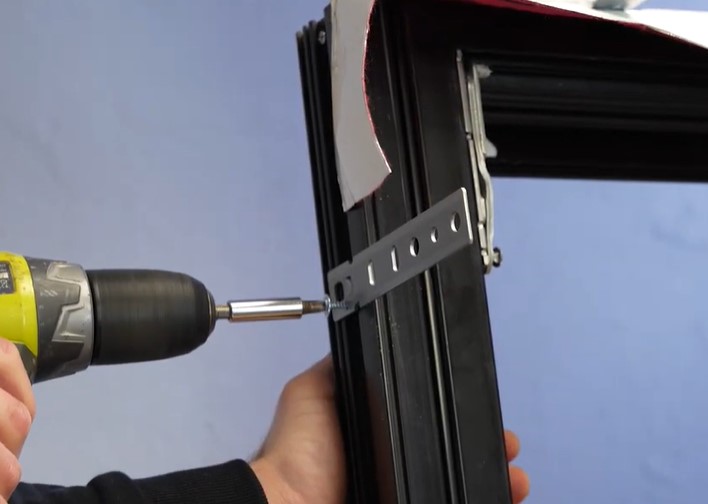
Screw the strap anchors in place using self-drilling screws made of stainless steel or galvanized steel.
Using the proper material prevents corrosion caused by the contact of regular steel with aluminum.
Once the anchors are screwed in, bend them inward toward the window to make positioning easier.
Secure the tape with regular adhesive tape to protect it from damage during positioning.
Stage 4: Place the window in the opening
You will need:
- spacer blocks,
- support blocks,
- a level.
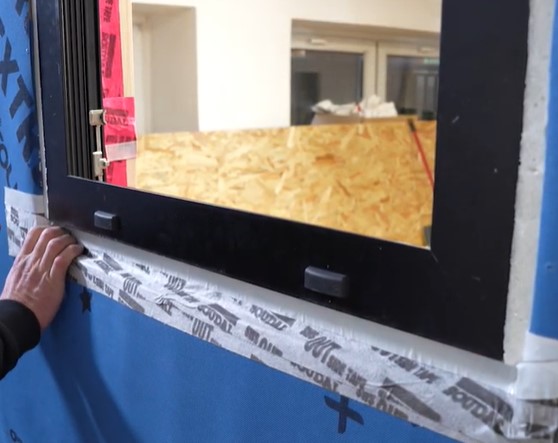
Leveling the window
There are two ways to level the window at the bottom: with or without support blocks.
If the sill surface is perfectly flat and level, support blocks are not required. The window may be placed directly on the surface and sealed with an adhesive sealant.
If the bottom of the opening is uneven, support blocks must be used.
Important: Bottom support blocks must be flush with the window frame and securely fixed in place. They must not move.
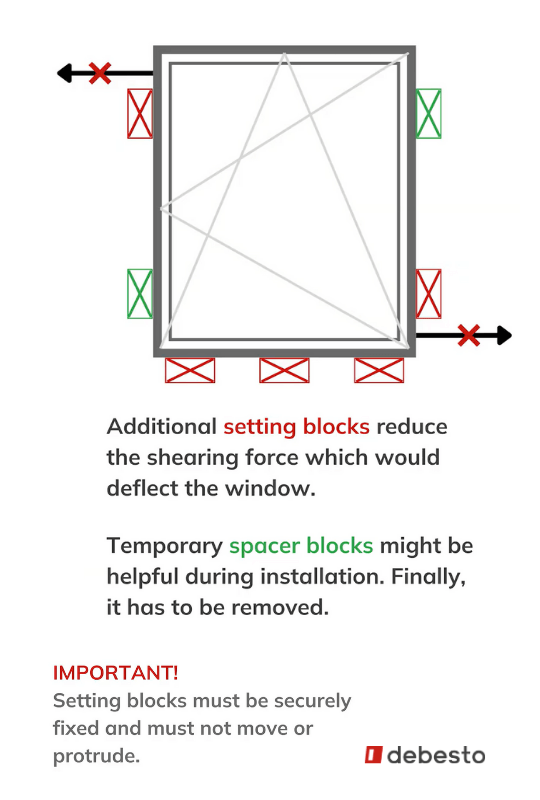
Support blocks (permanent shims) remain permanently installed to prevent frame distortion. Position them under the hinge side at the bottom and at the opposite corner to properly distribute the load.
Spacer blocks (temporary shims)are temporary and may be removed after installation.
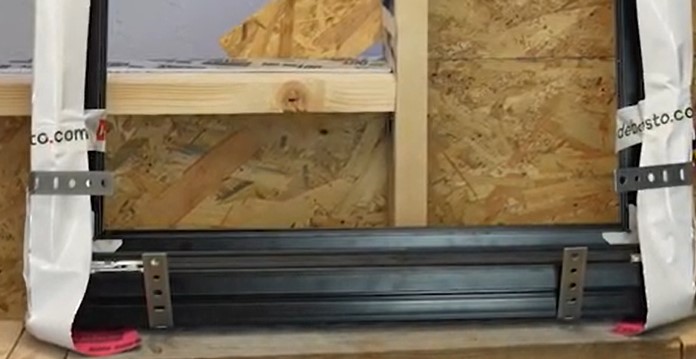
Set the window on the lower support blocks. Align it vertically and horizontally and wedge it securely. Ensure even mounting gaps on all sides – this will be crucial for proper sealing.
Stage 5: Mechanical installation

You will need:
- a drill,
- structural wood screws,
- a hammer.
Fasten the pre-installed strap anchors to the window opening framing using structural wood screws, two per anchor.
If any anchors protrude beyond the wall surface, bend or trim them as needed.
Remove the temporary spacer blocks.
Stage 6: Insulation and sealing
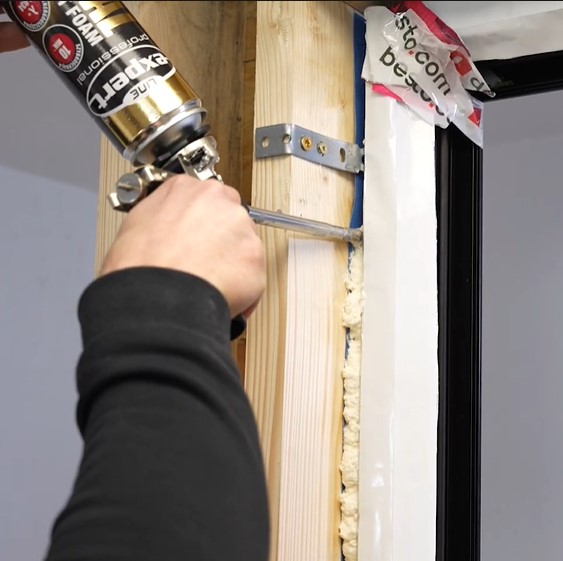
Apply the low-expansion foam
Before applying the low-expansion foam, lightly dampen (do not soak) the surfaces.
Apply foam evenly from the bottom, following the manufacturer’s guidelines. For larger gaps, apply in two stages, waiting for partial curing between layers.
Once cured, trim excess foam carefully to maintain insulation properties. Avoid compressing or tearing it. Ensure the excess membrane is cut at the outer edge to prevent folds that weaken thermal performance.
Pro tip (hot weather): In hot weather, store the low-expansion foam can in a refrigerator before use to slow down expansion. Do not freeze the foam. Always follow the foam manufacturer’s storage and temperature recommendations.
Applying inner and outer sealing tapes
Inner tape (inside):
Use vapor-permeable tape. Remove protective liners and apply from the bottom up. If installing a sill trim, attach the tape to it.
Press the tape firmly without stretching, forming a compensation fold to absorb structural movement.
Secure all mounting strap anchors passing through the sealing layer with tape to prevent thermal bridging.
Outer tape:
Use waterproof yet vapor-permeable tape. Apply from the bottom, overlapping layers like roof tiles.
The amount overlapping the window frame depends on final visibility.
The upper tape is applied last, connecting to the exterior windproof membrane to prevent water infiltration.
Finally, seal cut sections of the membrane with tape.
Stage 7: Reinstall the window sash
Once the frame is fully installed and sealed, reinstall the sash according to the hardware manufacturer’s instructions.
Final touches: Attach the handle and make minor hardware adjustments as required.
Handle installation: Install the handle with the sash closed and the handle in the closed position (horizontal). Do not force the handle.
Real-life tips from experienced European window installers based in the U.S.
Install? Not a problem. It’s about the same as American windows. If you’re experienced, you’ll handle it.
The only real challenge was the weight – these windows are just much heavier than typical American ones.
But to me, that also means better quality. More material, more solid build.
The difficulty level of installing European windows is different; they are heavier than American ones and require more precision.
However, in the end, if I can pay less and get better quality, I choose windows from Poland over American ones.
Before you order European windows: Cost and risk impact
Before you place an order, you need to lock down one thing: how the windows will be installed on your jobsite.
Your installation strategy directly impacts cost, scheduling, and execution risk on the jobsite.
What do you do if you don’t have a crew experienced with European (flangeless) windows?
Your local crew installs European windows with guidance
You can use the guide to support them step by step.
Many developers reduce risk by ordering a single test window (like one of our clients in North Carolina) or by visiting one of jobsites with their crew lead. From our customers’ experience, crews can switch to the European installation method fairly easily.
If this isn’t possible, here are emergency options.
Bring in experienced installers
Look for an experienced crew locally. If you can’t find one, debesto can share contacts from our network of clients in New York and nearby. They can either train your crew or handle the installation themselves.
Order European systems with nailing flanges
This aligns better with typical U.S. installation habits, but the trade-off is cost. Depending on the system, nailing flanges usually add approximately 13–34% to the window price compared to standard European configurations. Also note: fins are typically available for windows, not for sliding doors.

Get the windows and the support you need
Don’t let installation fears hold back your ROI. Get high-performance European windows with an access to our technical support network.
See full-service solution for Spec Home BuildersFrequently Asked Questions on European window installation
Yes. Our technical team provides online support and delivers all necessary instructions. If needed, we can also connect you with an installer from our client network.
Yes. This installation system has been the standard in Europe for decades. As long as the installation follows the guide, the entire system remains perfectly watertight.
Additionally, European windows feature an internal drainage system that prevents water from entering, even without flanges.
Flangeless installation typically takes about 1.5 times longer than the standard “nailing fin” method.
Expect the first few windows to take longer (up to 2-3x), but the pace picks up significantly once your crew adapts.
You trade speed for precision: this method gives you full control over leveling and sealing tightness, ensuring a high-quality install regardless of framing imperfections.
Every window set includes hardware, handles, and strap anchors. You need to provide the tools yourself, as well as installation materials like screws, foam, and sealing tapes.
If you haven’t worked with European windows before, be aware that they are heavier than U.S. windows. Large units in particular may require additional lifting equipment. You can find the exact weight of each window in the technical specifications on your invoice.
Yes, you can order windows with nailing flanges. However, keep in mind that these products are 13% to 34% more expensive than standard models.